In today’s post on our
Indian Art form series, I’m gonna talk about the art of paper cutting, better known as Sanjhi. Like the name itself suggests,
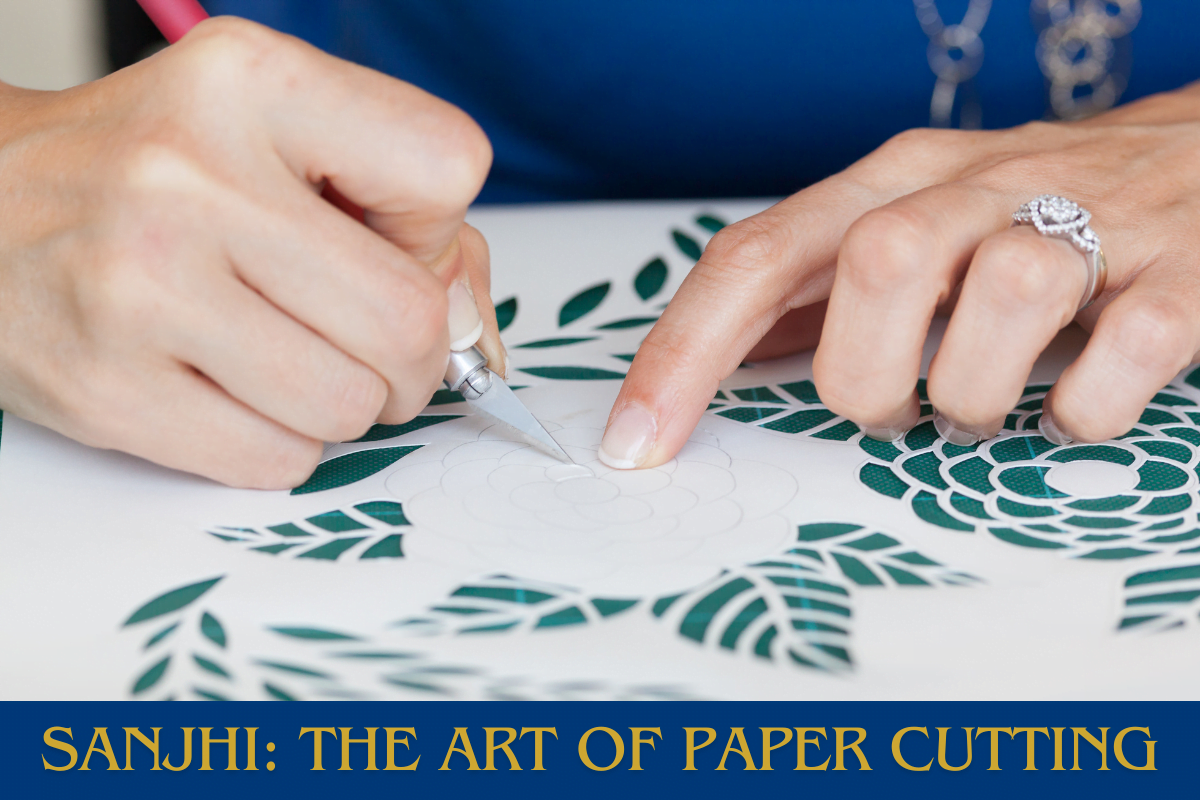
Sanjhi, or paper cutting art, is an art of paper cutting. The paper is cut in a way that the paper holds together, and yet it shows a beautiful, intricate pattern on it. For the complete tutorial on Sanjhi, watch the video below.
Origin:
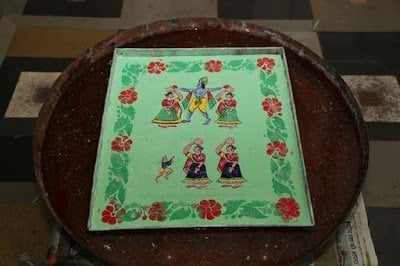
Sanjhi is practised in Mathura and Vrindavan in Uttar Pradesh in India. Though the paper cutting work is done all across the world, Sanjhi is a little different. Sanjhi is said to have originated around 400-500 years ago in the 16th or 17th century. So like all the other Indian art forms I have shared here previously, this art form is also very ancient. Some craftsmen believe that Sanjhi word is derived from Saanjh or Shaam which means dusk, the time of day when temple floors are decorated using these stencilled papers and on the other hand, some craftsmen believe that Sanjhi word is derived from saaj-sajja or sajavat which means decoration because these papers are used to decorate temple floors.
 |
| Image Source: The Hindu |
Theme:
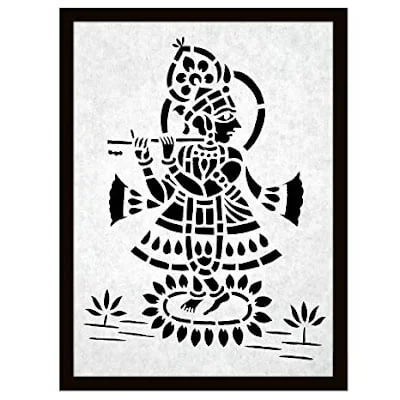
Since it is a traditional art form of Mathura, the birthplace of Lord Krishna, the theme mainly depicts the life of Lord Krishna and his leelas. Temple floors and walls are decorated using these stencilled paper and rangoli (powdered colors). This art form is highly refined, so it is mainly done by the Brahmin priests. Nowadays, only a few families, to be precise only 14 or 15 families, are there in Mathura and Vrindavan who practice this art. If you are interested in seeing Sanjhi in temples, then the Radharaman temple in Vrindavan is the place where you can see this art. It is believed that Radhe (Radha) used to decorate her walls and floors using colored papers, foils, colored stones, and flowers and leaves to woo Krishna, and then all the other Gopis followed suit. But during the Mughal period, the art form began to depict more scenes like Mughal architecture, floral and geometric patterns, and various other scenes.

Style:
Like I said earlier, it is an art of paper cutting, so only paper, specially designed scissors, and sometimes a blade is used to cut paper, and then intricate mythological figures, floral and geometric patterns are cut into the paper. And here, I would like to share an amazing fact that in its traditional form, craftsmen don’t draw or trace the design on the paper; they would just make the paper cutting directly on the paper, and it is done so precisely that you wouldn’t be able to find any flaw.
Here, I would like to mention two names who are still reviving this art form and keeping it alive. They are Mr Mohan Kumar Verma and Mr Ram Soni. They are fourth-generation Sanjhi artists.
Process:
The process is simple. I have divided it into two steps
1. Draw/trace/print the design on paper and
2. Start cutting the design
Below are the supplies you’ll need to make paper cutting artwork.
Supplies:
1. Paper
For paper cutting art, you will obviously need paper. It can be handmade paper, good quality printing paper, watercolor paper, or any paper from 100 gsm to 300 gsm. Remember, the thinner the paper is, the easier it is to cut, but that will increase the chances of making mistakes. The thicker the paper is, the harder it is to cut, but then there will be fewer chances of tearing the paper accidentally. I’m using 120 gsm A4 size scrapbooking paper.
2. Cutting Mat
You will need a self-healing cutting mat so that your work surface is protected. Otherwise, you’ll end up making the surface of your desk full of scratches. I would suggest you get the bigger mat as having a bigger cutting mat gives you enough working space and allows you free hand movement while cutting the paper. The mat given below has a grid and patterns marked on both sides. This is a must-have item for a crafter or for people who love DIYs.
3. Blade or Scalpel
You will need a scalpel for cutting paper. So make sure you have some spare blades, too, in case you need them during the process. Keep all the spare blades safe in a case to protect yourself from accidental blade cuts.
4. Pencil, ruler and eraser
You will need a pencil to draw a design on the paper and a ruler to cut straight lines.
1. Draw/trace/print the design on paper
Place the paper on the work surface and for design either you can draw your design like I did. If drawing isn’t your cup of tea, then below is the template for you to copy. Just download and print it. There are several other websites from where you can download free paper cutting templates (Google it). The printed side will be the wrong side, so make sure you print the mirror image of the design. The design is cut on the printed side of the paper, and the other side will be the right side where no pencil marks or print will be visible.
*Tip: Do not apply cream or moisturizer on your hands; otherwise, you’ll end up staining your paper.
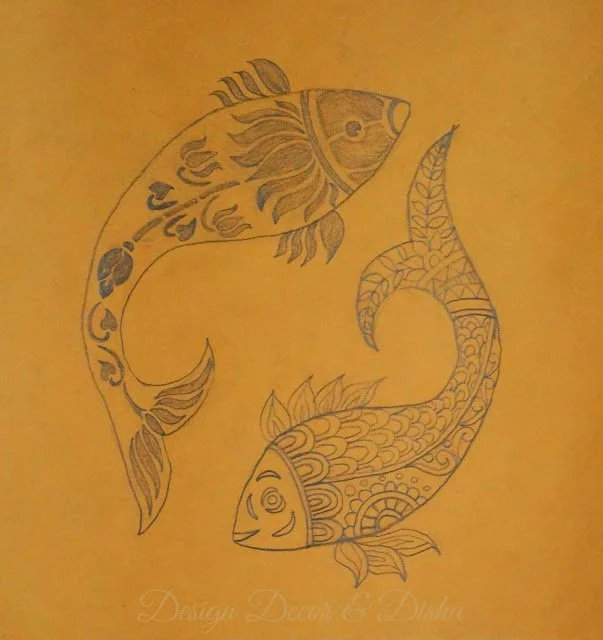
I drew the fish with Pichwai lotuses especially for you all so that it is easier for you to start the paper cutting art with this easy template. All you need to do here is carefully cut out all the black or shaded parts of the design. For the outline of the fish, please draw one more outline as I forgot to click that picture, and while cutting that outer outline, leave some tabs too (Watch the video at the end of the article for clear instructions). Once you are confident enough to cut complex designs, you can start cutting the fish design with intricate patterns. All the instructions are given in a YouTube video.
 |
| Design Created by Disha Mishra Dubey |
2. Start cutting the design
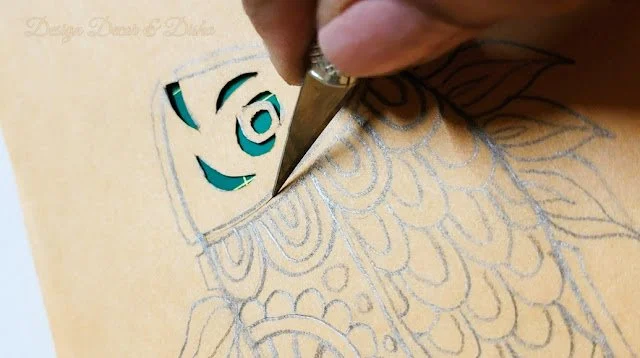
Now, place the paper on the cutting mat and hold the knife like a pen and try to keep even pressure. Enjoy the process and relax. Don’t do it in a hurry. This process requires enormous concentration, patience and skills, but it relieves your stress, and you will love getting lost in it for hours. There’s no set way to learn paper cutting art. Keep practising, and you will learn it.
 |
| Sanjhi – The Art Of Paper Cutting |
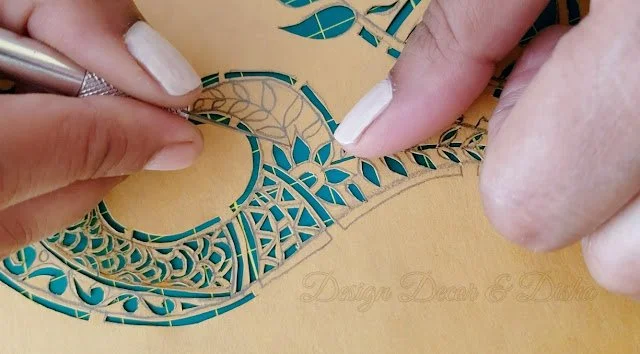
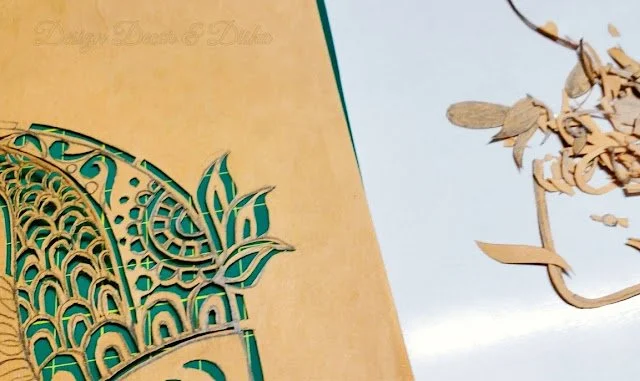
For cutting straight lines, you can use a ruler, but for curved designs, it is better to move the paper around. While making cuts, hold the paper with the other hand for better control. Cut the paper deeply enough that it goes through the paper but not too deep. Remove the pieces of paper as you cut them out. You can use the blade’s tip to lift the chip of paper and pull it gently with your fingers. If it doesn’t come out easily, then use the blade to cut the paper where it is stuck, and then it will come out easily.
 |
| Sanjhi – The Art Of Paper Cutting |
To cut complex and intricate patterns, cut as close as you can to either side of the pencil line. Do it slowly, and enjoy every bit of the process.
 |
| Sanjhi – The Art Of Paper Cutting |
No matter how pro the artist is, the blade sometimes slips and can sever the element of the design. Don’t panic. Use either sticky tape to fix the element or use a chip of paper to stick on the tear. Once the design is complete, reverse the paper to reveal the right side of the design. Now, either you can get the design framed as it is pressed between two glasses, or you can stick the design on the contrasting paper to make it more interesting.
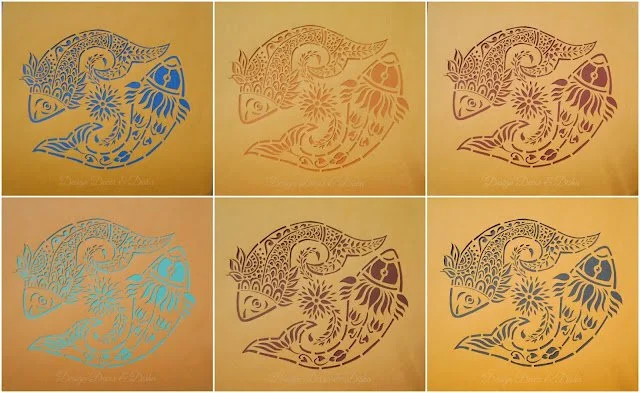
I have tried to place my paper-cutting artwork on various colored papers, and now I am totally confused about the right color background. Please help!!
 |
(From top left to bottom right
Sapphire, Ochre, Maroon, Cyan, Brown, Black) |
I hope you liked today’s post. If you try to make this art, then don’t forget to share your creation with me on my Instagram or Facebook.
I’ll be coming up with more creative posts. Stay Tuned!!



9 Responses
Saphire is looking natural with fish
Thanks for the suggestion 🙂
Wonderful art… Keep going!
Very nice Designs, please keep posting more articles like this. thanks
How much did it cost you to start up your website?
Hi to all, the contents existing at this web site are actually awesome for people experience, well, keep up the nice work fellows.
Hello! This is my first visit to your blog! We are a collection of volunteers and starting a new initiative in a community in the same
niche. Your blog provided us beneficial information to work on. You have done a extraordinary job!
Great article.
Enlightening and beautifully written