93K Subscribers
139 Videos
10.9M Views

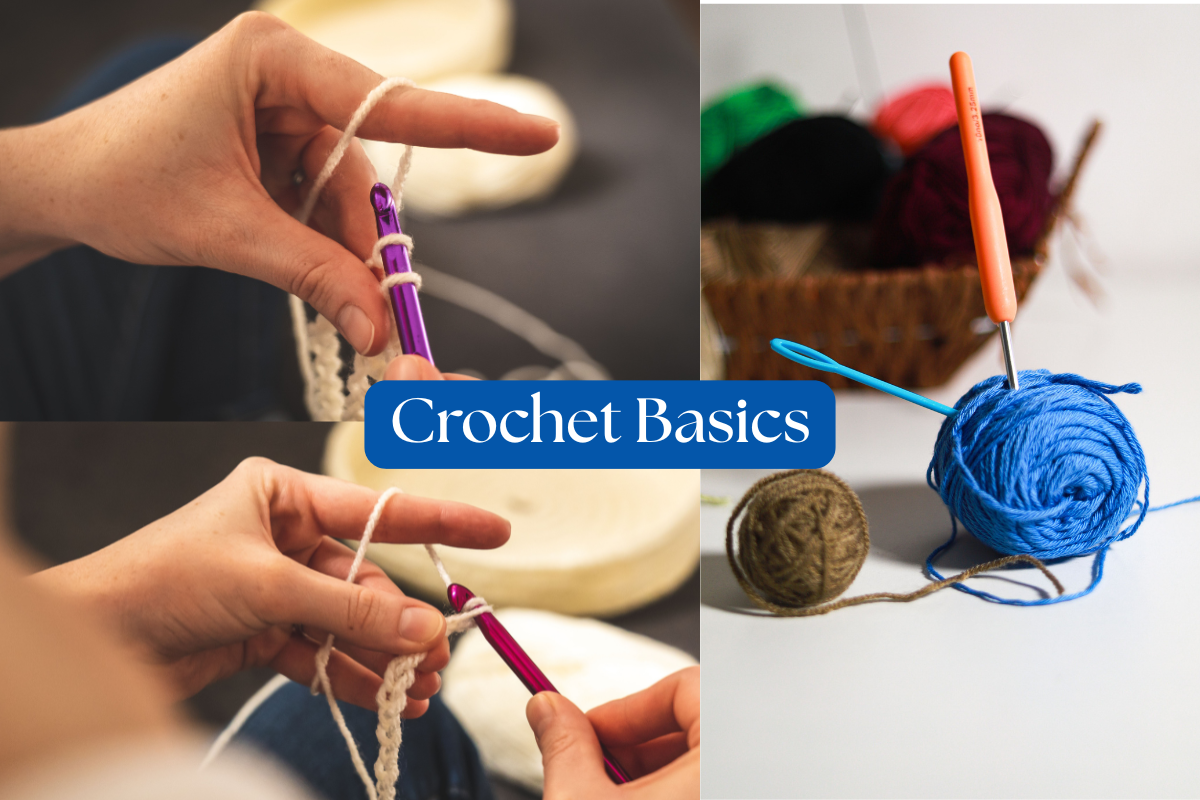
This blog is part of the “Hobby Box” series. The first hobby I picked is Crochet. Below are the links to previous blogs in case you missed going through them. Video tutorials will be shared soon.
Part 1: Crochet for Beginners – The Ultimate Guide to Crochet Supplies in India
Part 2: Crochet For Beginners – The Complete Beginner’s Guide to Crochet Hooks
Part 3: Crochet For Beginners – Complete Guide to Crochet Yarns
Click here to shop my handmade crochet products.
You’ve bought your crochet hook, chosen your yarn, and you’re excited to begin. But before you jump into making a blanket or an adorable amigurumi toy, it’s important to learn the basics of crochet.
Think of crochet like learning a new language. Before you can read a book, you need to know the alphabet. Similarly, before you can follow a crochet pattern, you need to understand how to hold the hook, make a slip knot, create a foundation chain, and work a few essential stitches.
Don’t worry if it feels awkward at first. Every crocheter, no matter how experienced, started with uneven stitches, missed loops, and plenty of frogging (yes, that’s a real crochet term and I have done it a lot!). With patience and practice, your hands will soon develop the muscle memory needed to crochet comfortably 🙂
This guide will walk you through the basics, explain common crochet terms, introduce the essential stitches, and help you avoid the mistakes that most beginners make.
Crochet is meant to be relaxing, so take a few minutes to set yourself up for success.
Choose a comfortable chair with good back support and make sure you have adequate lighting. Natural daylight is ideal, but a bright desk lamp works well too. Keep your hook, yarn, scissors, stitch markers, and tapestry needle within easy reach so you won’t need to interrupt your practice.
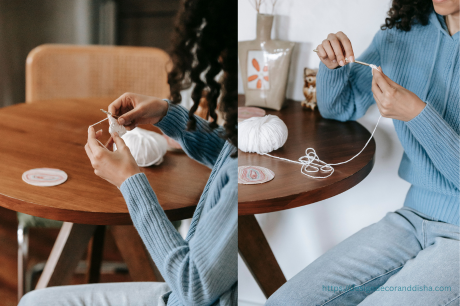
It’s also a good idea to take short breaks every 20-30 minutes to stretch your hands, wrists, and shoulders, especially when you’re just starting.
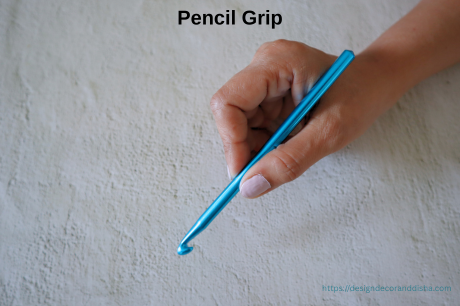
Most crocheters naturally prefer one of two methods. Hold the hook whichever way it feels comfortable to you; there is no ‘right’ or ‘wrong’ way to hold a crochet hook.
Hold the hook the same way you would hold a pencil. This grip offers excellent control and is often preferred for detailed work or smaller hooks. I prefer this grip for most of my crochet projects.
Hold the hook as though you’re holding a table knife. Many crocheters find this grip more comfortable for long projects because it allows the hand and wrist to stay in a more relaxed position. I prefer this grip when I’m working with chunky yarn.
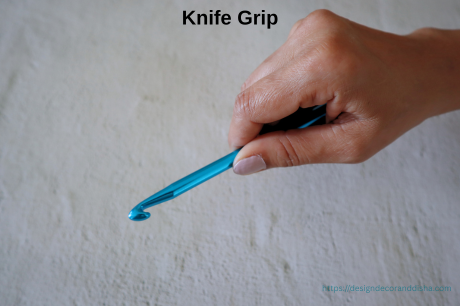
Try both methods and stick with the one that feels most natural. I’m stating again that there is no right or wrong choice.
Holding the yarn correctly helps maintain consistent tension, which is the secret to even stitches.
Most right-handed crocheters let the working yarn pass over the index finger and through the other fingers to create gentle resistance. Left-handed crocheters usually mirror this setup.
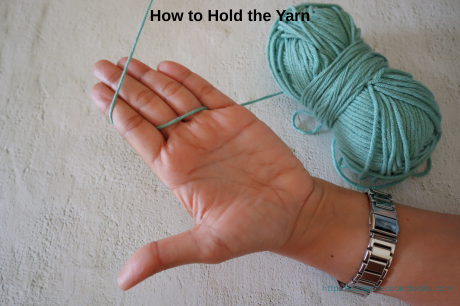
Don’t worry if your tension feels uneven at first. It improves naturally with practice.
One of the first words you’ll hear in crochet is tension. Tension refers to how tightly or loosely you crochet your stitches.
If your tension is too tight:
If your tension is too loose:
Consistent tension is more important than perfect tension. With regular practice, your stitches will become more even. So, don’t stress too much about tension; you will get the hang of it gradually.
Crocheters use many special terms. Learning them early will make reading patterns much easier.
| Term | Meaning |
|---|---|
| Stitch (st) | One completed crochet stitch |
| Chain (ch) | The foundation of most projects |
| Slip Knot | The first loop placed on the hook |
| Loop | The strand of yarn on your hook |
| Yarn Over (YO) | Wrapping the yarn over the hook |
| Turning Chain | Extra chains made before starting a new row |
| Fasten Off | Securing the yarn at the end of a project |
| Weaving In Ends | Hiding loose yarn tails using a tapestry needle |
| Gauge | The number of stitches and rows within a measured area |
| Frogging | Pulling out stitches to correct mistakes |
| WIP | Work In Progress |
| UFO | Unfinished Object |
Crocheters often joke that every hobbyist has at least one UFO hidden away in a project bag. Even I have it too. It’s a beautiful tote bag that needs a handle and lining to mark it as a complete project.
One of the biggest surprises for beginners is that crochet patterns are written using two different terminology systems. The same stitch can have different names depending on whether the crocheter uses US or UK terms. Always check which terminology a pattern uses before you begin.
I’m using US terminology.
Almost every crochet project is built using just a handful of techniques. Let’s learn them one by one.
The slip knot is the very first loop placed on your crochet hook.
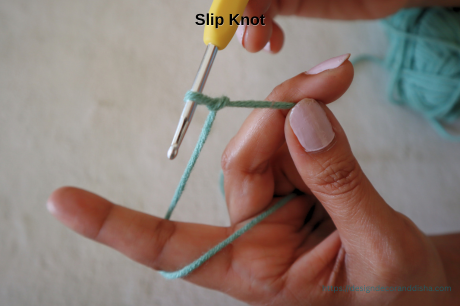
Congratulations! You just made a slip knot and you’re ready to begin crocheting.
The chain stitch forms the foundation of many crochet projects.
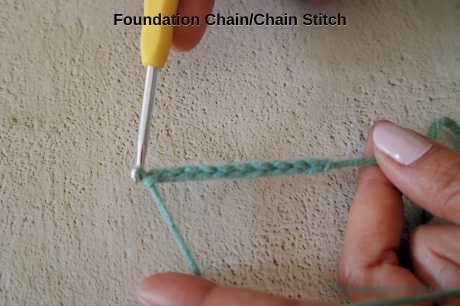
Practice making chains until they’re even in size.
The slip stitch is one of the shortest crochet stitches. It’s commonly used for:
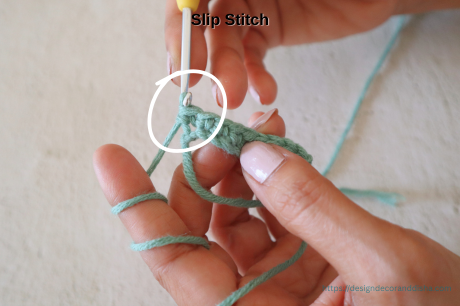
The single crochet is one of the first stitches every beginner should master. It creates a dense, sturdy fabric.
Perfect for:
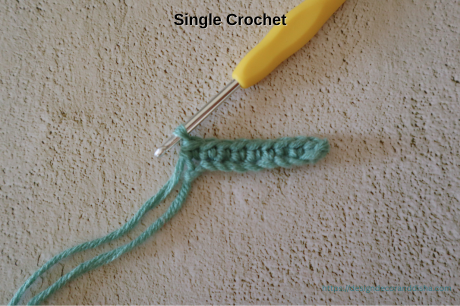
This stitch is slightly taller than a single crochet and creates a soft, flexible fabric.
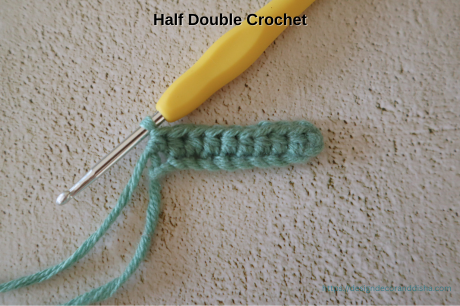
Double crochet is one of the most versatile stitches. It works up quickly and creates a fabric with excellent drape.
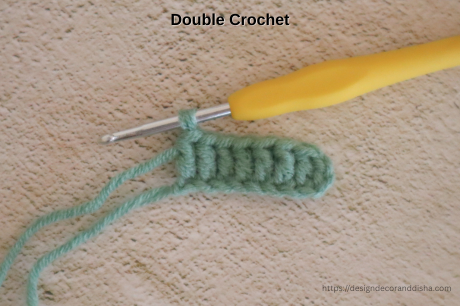
Treble crochet is taller than double crochet. It creates an open, airy fabric suitable for lace and decorative patterns.
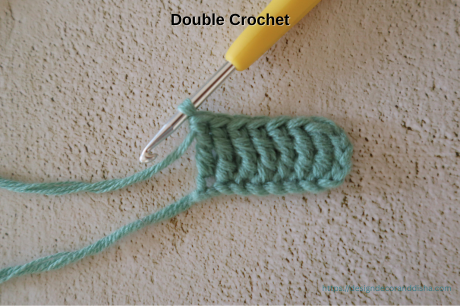
When starting a new row, you’ll usually make a turning chain. At the end of the row, a turning chain is made and then the work is turned.
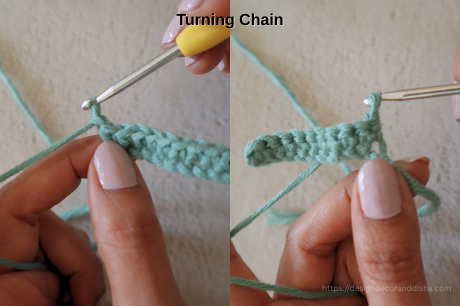
Typical turning chains:
Turning chains help your rows maintain their height and shape.
Many crochet projects work in the round, especially amigurumi, hats, and coasters, which begin with a magic ring (also called a magic circle or adjustable ring).
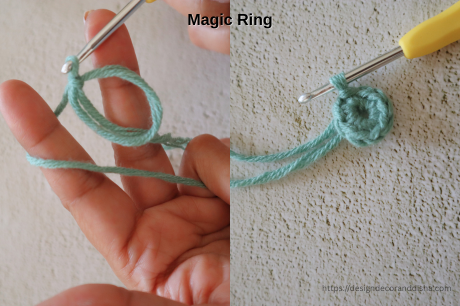
Unlike a chain loop, a magic ring allows you to pull the centre tightly closed, leaving no visible hole. It can feel tricky at first, but with a little practice, it quickly becomes second nature.
One of the most common beginner mistakes is accidentally adding or losing stitches. Get into the habit of counting your stitches at the end of every row. That’s what I do. When I am crocheting, I count my stitches, which definitely irritates my husband because it leads to a one-sided conversation 🙂
Using stitch markers to mark the first or last stitch can make this much easier.
Crochet patterns are simply a set of instructions written using abbreviations. Once you know the abbreviations, reading patterns becomes much less intimidating.
| Abbreviation | Meaning |
|---|---|
| ch | Chain |
| sl st | Slip Stitch |
| sc | Single Crochet |
| hdc | Half Double Crochet |
| dc | Double Crochet |
| tr | Treble Crochet |
| yo | Yarn Over |
| inc | Increase |
| dec | Decrease |
| rep | Repeat |
| sk | Skip |
| st | Stitch |
| sp | Space |
| fo | Fasten Off |
| blo | Back Loop Only |
| flo | Front Loop Only |
| cl | Cluster |
| tog | Together |
| sc2tog | Work two single crochet together |
| hdc2tog | Work two half double crochet together |
| dc2tog | Work two double crochet together |
| bp | Back Post |
| fp | Front Post |
| ch sp | Chain Space |
| mr | Magic Ring |
| cc | Contrasting Color |
| ws | Wrong Side |
Keep a printed copy of these abbreviations nearby while you’re learning.
Before attempting large or complex patterns, spend some time practising the basics with small projects. Good beginner projects include:
These projects help build confidence while reinforcing essential stitches.
Watching someone crochet can make the learning process much easier. Here are a few highly recommended international and Indian YouTube channels that explain techniques clearly and at a beginner-friendly pace:
When searching for tutorials, look for videos that specifically mention whether they use US or UK crochet terminology so the stitch names match what you’re learning.
Every crocheter makes mistakes in the beginning. The key is recognising them early and learning how to fix them. Some of the most common include:
Remember, mistakes are part of the learning process. Even experienced crocheters occasionally unravel rows to correct an error. Trust me, I have never done a single project without frogging.
Instead of trying to complete a big project immediately, focus on building your skills gradually.
Day 1: Practice making slip knots and chains.
Day 2: Crochet rows of single crochet.
Day 3: Learn half double crochet and practice it by making several rows.
Day 4: Alternate between single and double crochet to get comfortable changing stitches.
Day 5: Practice making a magic ring.
Day 6: Make a small coaster or dishcloth using one stitch throughout.
Day 7: Try a simple granny square or bookmark and celebrate your first finished project.
By the end of the week, you’ll have built a solid foundation for tackling more exciting patterns.
Learning crochet isn’t about making perfect stitches from the very beginning; it’s about enjoying the process, developing new skills, and creating something with your own hands.
Start with the basics, practise a little every day, and don’t be afraid to undo your work when things don’t go as planned. Every row teaches you something new, and every completed project builds your confidence. Let me know if you have any questions.
In the next and final part of this beginner series, we’ll put everything you’ve learned into action with a collection of easy first projects, a step-by-step learning roadmap, recommended free patterns, and practical tips to help you continue your crochet journey with confidence.
Happy Crocheting!!!


Starting a new video series. Watch the video for the details and hop on the bandwagon if you are interested.